Saturday, November 12, 2005

Learning a lot about creating graphics...FINALLY!

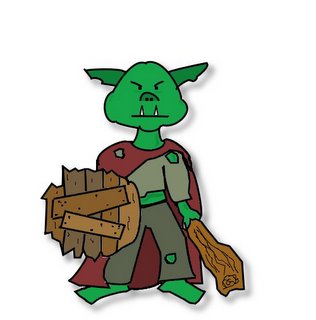
Well, it's been a while but I'm finally getting to the point where I can created some decent images using graphic software. This is a Goblin warrior I created using Gimp. I'm getting to the point where I can actually create images like this one in just an hour or so.


"Goblin Warrior"

Also, I did the testing on the line class (suggested by ZMan) and I hope to post those results sometime this week as well (for those of you who don't want to wait for those, he was right, doing the draws in a batch was faster).

Anway, I'm still working on the game, still trying to blog my progress (ever so slowly) and hopefully my research and work at figuring out how to use Managed DirectX to created a 2D game will benefit others as well.

Tuesday, October 25, 2005

Creating a Line in Managed DirectX

Well, I finally saw a question I thought I could answer in the Microsoft forums. A guy was asking how to easily create a Line in DirectX and I thought for sure I knew the answer. I thought you would just create a square from two triangles. I was going to make a really slick line class and deliver the solution too him. I had even began the development.

Then I rechecked the forums and Andy the ZMan had already answered the guys question with a short one liner. Use the Line class. What??!? There's a line class? Started looking around and what do you know? There's actually a line class.

I wrote up some sample code using the line class and then posted it to the forums and I casually tossed out that I would wrap all those steps in a line function to make it easier to work with the DirectX Line class.

Now, I've went one step further. Below is the code I've written to wrap the Line class in the simplest sense, to make it very easier to create and render a line.

'Description: Microsoft.DirectX.Direct3D.Line class wrapper to make it easier to
'           work with and manipulates Lines
Public Class DXLine

'Line object
Private mLine As Microsoft.DirectX.Direct3D.Line

'Starting point for the line
Private mStartPoint As Point
Public Property StartPoint() As Point
      Get
           Return mStartPoint
      End Get
      Set(ByVal Value As Point)
           mStartPoint = Value
      End Set
End Property

'Ending point for the line
Private mEndPoint As Point
Public Property EndPoint() As Point
      Get
           Return mEndPoint
      End Get
      Set(ByVal Value As Point)
           mEndPoint = Value
      End Set
End Property

'Width of the line
Private mWidth As Integer
Public Property Width() As Integer
      Get
           Return mWidth
      End Get
      Set(ByVal Value As Integer)
           mWidth = Value
      End Set
End Property

'Color for the line
Private mColor As System.Drawing.Color
Public Property Color() As System.Drawing.Color
      Get
           Return mColor
      End Get
      Set(ByVal Value As System.Drawing.Color)
           mColor = Value
      End Set
End Property

'Line class constructor
Public Sub New(ByVal startPoint As Point, ByVal endPoint As Point, ByVal width As Integer, ByVal color As System.Drawing.Color, ByVal dxDevice As Microsoft.DirectX.Direct3D.Device)
      'Store the data passed into the class constructor
      mStartPoint = startPoint
      mEndPoint = endPoint
      mWidth = width
      mColor = color

      'Create the line object
      mLine = New Microsoft.DirectX.Direct3D.Line(dxDevice)

      'Automatically antialias the line
      mLine.Antialias = True
End Sub

'Draw the line using the current class values for starpoint, endpoint, width and color
Public Sub Draw()
      'Give the line it's width     
      mLine.Width = Width

      'Render the line
      mLine.Begin()
      mLine.Draw(LineVectors, Color)
      mLine.End()
End Sub

'Construct the Line Vectors based on the Start and End Points
Private Function LineVectors() As Microsoft.DirectX.Vector2()
      'Vector object (for passing startpoint and endpoint into Line.Draw function)
      Dim aLineVectors(1) As Microsoft.DirectX.Vector2

      'Set the starting point of the line
      aLineVectors(0).X = StartPoint.X
      aLineVectors(0).Y = StartPoint.Y

      'Set the end point of the line
      aLineVectors(1).X = EndPoint.X
      aLineVectors(1).Y = EndPoint.Y

      Return aLineVectors
End Function

End Class


So basically to use this class, I first create a line object in my Main module when I'm initializing all my DX objects. Then during my Render code I just call the objects .Draw method and that's it, a Line will be drawn to your scene.

Module Main

     Private mLine As DXLine

     Public Sub Main
          ...
          ....
          mLine = New DXLine(New Point(5, 100), New Point(5, 300), 10, System.Drawing.Color.BurlyWood, mDXEngine.myDevice)
          ..
          ....

          Do While GameOver = False
               ...
               ....
               Call Render()
               Application.DoEvents()
               ...
               ....
           Loop 'While GameOver = False

          ...
          ....
     End Sub


     Public Sub Render()
          ...
          ....
          'Draw the line
          mLine.Draw
          ...
          ....
     End Sub

End Module


Hopefully that helps someone, it's a pretty simple implementation, but I think that I will be using it a bit.

Friday, October 14, 2005

My Background is Scrolling like a Champ

Well, I quickly created my background graphics last night. Made some changes to my Background class and I now have a successfully scrolling background.

One thing I like about my background class is that I really tried to make an effot to make it very reusable for future projects. It will take any number of background images that comprise your background and scroll through them properly.

The code isn't really that impressive, but I like that fact that I can change what backgrounds are scrolling just by passing in new images to the class.

Looking the the DevExpress metrics for my class though, I do have 3 functions that have unacceptable complexity (I try to keep everything below 100 and these three are above 300) so I want to work on lowering their complexity before I post my class code.

Image hosted by Photobucket.com

Wednesday, October 12, 2005

Getting back to development...

Well, in an effort to get back to doing some actual development and quit monkeying around with Paintshop so much, I've laid out some simple goals so that I don't overextend myself creating oodles of art and not doing any actual development.

1. Create animations for the main character,
This will consist of 2 different sets of animation, approximately 5 frames each.

a. Walking left to right
b. Attacking

2. Create the Level 1 background.

I had this finished at one point, but I created it in basic paint so the quality was definitely not there. So I plan on recreating this using Paint Shop pro (and take advantage of its WONDERFUL WONDERFUL layers!!!)

So I have approximately, 11 graphics to create. Then, once those graphics are done, I have the following plans.

3. Have the game start with loading the background without the character and displaying the "Level 1 (press any key to start)" text in black (using DrawText I'm guessing)

4. After user presses key, make a game start sound and draw the character on the screen.

5. Begin playing a background track (most likely a free one from the web for now)

6. User can walk to the right (and back up by moving left)

7. Allow the user to walk and begin scrolling the background when appropriate.

8. Display "Success!" once the user has walked to the end and off the level.

With these plans, I'm hoping to limit the amount of time spent creating character animations (later I'll want to add Jump, Take Damage, Duck, etc) so that I can get back to actually doing some more Managed DirectX development.

I'll post some character shots after I get them done as well so you can see when I'm moving from the initial graphic stage into tackling some new development.

I'm really looking forward to doing the music and text pieces as well since I haven't actually coded anything for those pieces yet in Managed DirectX.

Then once, I get that level 1 initial round of coding done, I'll try and post some more complete examples of how my classes and code actually work.

Saturday, October 01, 2005

Ye Olde Weapon Shop

I've started spending a lot of time on the intro and first level of my game. In doing so I've had to spend a lot of time learning how to use Jasc Paint Shop Pro 8 (I've never used anything other than the default paint program before). At first I got so frustrated I felt like I should just draw everything by hand, scan it in and then edit my scanned images, but I think I'm starting to get the hang of things now.

Image hosted by Photobucket.com

I'm pretty happy with the way this turned out. The Weapon Shop looks exactly how I was picturing it in my head and I was able to create it in the same graphic style I want to use for the whole game.

I'll try and post some other graphic samples as I get them completed and then hopefully I can get back to the coding. I only plan on doing the graphics needed for the first level and for the game introduction (and both are rather small in scale) so soon I will be able to focus once again on 2D game development with Managed DirectX.

Friday, September 09, 2005

Creating the 2D Graphics: The unstoppable blackhole of time

Well, I've been learning some about animating 2D characters. I understand now why people hire artists to do the work for them. One, it's very time consuming and two, you begin to realize you're not very good and to take the time to become good takes away the time from development so number two is basically the same as number one, it's time consuming.

I'm hoping to get some screenshots up soon of some of my in game graphics. I'm also hoping that I'm doing the animations right. So far, how I'm accomplishing animation is just loading up a different texture (or a new section of a texture) that has the same graphic with some slight changes.

This becomes kind of like flipping through once of those stick pencil flipbooks. So when you start walking a character you start cycling through the textures to simulate his movement while walking.

When the player stops walking, you revert back to your standing still texture.

Anyway, hoping to get some screenshots up soon as well as get some more code posted.

It's just unbelievable the number of images needed for each type of movement. Even for creating dropped items like coins. If you want them to have some type of glimmer or such, yep, need a couple of images for each item. Like I said, time consuming.

Wednesday, September 07, 2005

Background Class

Well, I didn't finish my background class like I thought I would this weekend. A recent purchase kind of got in the way (Guild Wars is awesome!)

But I have thought about somethings that it needs to be able to do so I thought I would jot some of those thoughts down here.

1. Autoscroll flag - basically sometimes you want the background to autoscroll and sometimes you don't.

2. Wrap textures flag - sometimes you want to keep cycling through your background textures and sometimes you don't.

3. Multiple background textures - break the level up into smaller graphics

4. Horizontal Scroll/Vertical scroll - able to scroll backgrounds horizontally or vertically depending on game and level.

So currnetly I have the ability to autoscroll a single background image horizontally continuously. Still a ways to go to provide all the other functionality.

Still pretty cool that it's working though. I had some fun with it thise weekend by having my son draw a background on paper and then draw some characters on another paper. We scanned those in, I added them to the game and viola his litte guy he drew was now walking all around the background he drew. He thought that was pretty cool!

Maybe I'll post up some pictures of that later.